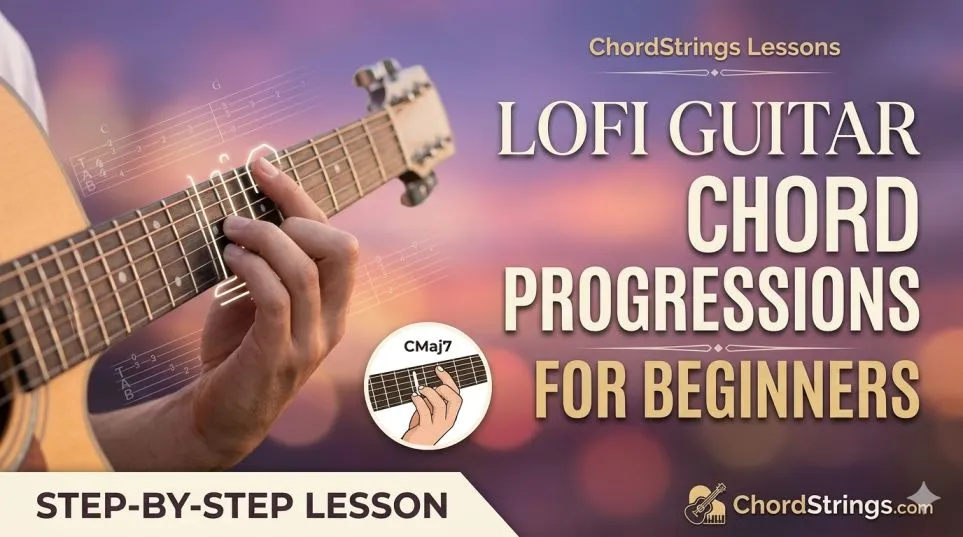
If you wish If you want to learn to play the guitar first lesson but don't know where to start, you're in the right place. Position. In this lesson you will learn to play your first real song on the guitar. In five easy-to-understand steps. These steps include the basics of the guitar first lesson (Guide). For storing guitars and basic guitar numbering systems), Basic Strumming, basic chord shapes, smooth chord changes, and your first song. Everything you learn here can be applied to both electric and acoustic guitars.
1. Guitar Basics
The two basics we'll cover here are guitar handling and the three basics. Guitar numbering systems.
How To Maintain It The Guitar
A Random Method: There are several ways to hold the guitar, but only in this lesson we will address the most common problem. The cowardly way to keep it guitar first lesson is when you put the guitar on your right leg, yeah, you're right hand and bring it closer to the body. Temptation like a new guitar first lesson. Typically, the player slides the guitar along the leg to see what happens. He tries to avoid it. Bring the first guitar lesson close to your body and sit down on the right.
All 3 Numeric Systems
Keys
OR Metallic strips running along the keyboard. The one furthest to the left, If you are right-handed, this is the first box. The next one on the right the first is the second and so on. It's very simple but important understand when you start learning chords and scales.
Fingers
The numbering system for the fingers of your fidgety hand is very simple, but also important. Your index finger is your index finger, your middle finger is yours The second finger, the ring finger is the third finger and the little finger is yours fourth finger Very simple here too, but very important for beginners. Find out where to place your fingers to form chords.
Channels
The final numbering system applies to the open strings of the first lesson for guitar. The best the string is the first string and the thickest string is the sixth string. Beautiful easy to remember.
2. Essential Strum
Both main the things we will focus on here are picking and strumming.
The Guitar Select
Select you A Selection
Many students ask what type of selection they should use. I would recommend Start with a standard pick of medium thickness, about 0.73 mm. From you can try thicker or thinner options and decide what you prefer. YES you don't want to use a pick that isn't necessary. You can just do it scratching movements with the thumb or thumb and forefinger.
Hold a Selection
The way you hold the pick and your grip are quite subjective. You can get started with a fairly generic selection identifier and experiment from there. Insert the pick into the tip of the thumb and then the index finger pointed downward. Try to stay relaxed. Many new guitarists have difficulty holding the pick scratch. In that case, you can always try holding the pick thumb, index and second. It just gives you a little more Control and stability. Try different straps and see which ones work for you.
Play Technique
Arms raised: Getting comfortable can be quite difficult at first. I have some advice this will make things a little easier for you. First, when you perform a service it is not necessary to play all six strings, including the chord you are playing. All six strings are used for playing. Most people usually only make it to the top 3-5. Ropes with their upward movements. The second tip is to only use most of the pick. Because you need to play at the appropriate volume for the song you're playing. Play. If you drill the pick into the strings too much, this is likely to happen. I have a hard time getting through all the bites. Experiment with relaxed upward movements and be sure to follow the two tips above.
Number: Now let's talk about counting. Most of the songs have a four-four time signature. Just that this means that there are four beats for each measure of music. Think about when I heard a drummer count "1 2 3 4" in a song. These numbers are the rate of Music. The "1" of each loop as you count. If you do, you will break the whole thing into pieces. Degrees. Now try to guess each number during the countdown or countdown alternate downward and upward movements. If you guess all the numbers, you will be Quarter Note Jingle.
3. Essential Chord Shapes
First Two simple chord shapes we will learn are E minor and D2.

And smaller Chord
To play to be E minor chord: Place your middle finger on the second fret of the fifth string e Third finger on the 2nd fret of the 4th string. Make sure your fingers are okay behind the belt and dive to the end of the belt Finger. You should also be careful not to rub your fingers together. Against nearby strings and silences them. You can see the diagram. For this agreement on this page. Once you've nailed down the chord, strum each one. Play the single string slowly to make sure the chord is clean and clear.
D2 Chord
Or second the chord you need to learn is a D2 chord. Place your first finger on top of your second. Fret on the third string and the index finger on the third fret of the second string. Again, make sure your fingers are directly behind the keys right at your fingertips, and your fingers aren't Rub the adjacent strings. The diagram for this D2 chord is This Page. Pluck each string slowly to make sure the tuning is clean and clear Of course.
Making Clean Chords
If you are having trouble playing these chords Clean and clear, you can try to bring your elbow closer to your body. That can put your hand in a better position to reach the notes. Maybe you want it to Try the classic method of holding the guitar with a stool or Standing/sitting on a leash. This will lift and position the guitar you are also in a better position to get votes.
4. Change Soft chords
This it’s a One of the most problematic areas for new guitarists, so I have two important areas Tips for you.
Agreement Tip no. 1
the first tip is to know the form of each agreement very well. Before even trying to switch from one to the other. If you try to switch between files Agreements before accessing the individual forms directly make the challenge more difficult and risk frustration.
Agreement Changing Tip no. 2
The next tip is to imagine the chord you are changing to. Think about what the next chord will sound like, then move on to this one. You also need to anticipate and anticipate the next deal this will not surprise you.
Read Also: Guide to Tuning a 7-String Guitar and Essential Variations
5. To be First Song
A final first step is to put together everything we've seen and learn your first song.
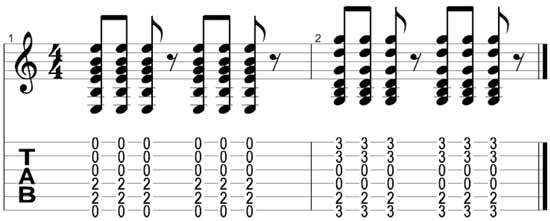
Alarm Clock Progressions
An agreement A progression is simply a specific order of chords put together to be played. A song. This song only uses the two chords we learned, so that's awesome. Simply. The basic idea is to play E minor for one measure “1 2 3 4” and then Play a D2 for a “1 2 3 4” bar. You can start by playing whole notes or Play each chord on “1” of each measure. Try it and don't forget. Count it out loud.