I remember the first time I made a string instrument with my nephew. We had a shoebox, some rubber bands, and a pencil. That was it. He was six. He was bored. I wanted to show him that music does not need to come from a store.
We stretched the rubber bands around the box. We slid the pencil under them. He plucked one. His eyes went wide. It made a sound. It was not a great sound. But it was a sound. He made it. That was the point.
We spent the next hour trying different rubber bands. Thicker ones. Thinner ones. We moved the pencil around. We discovered that tighter bands make higher sounds. Looser bands make lower sounds. We were not making music. We were making noise. But it was our noise.
That experience stuck with me. I have made dozens of these instruments since then. For kids. For adults. For myself. They are not professional. They are not pretty. But they work. And they teach you something about sound.
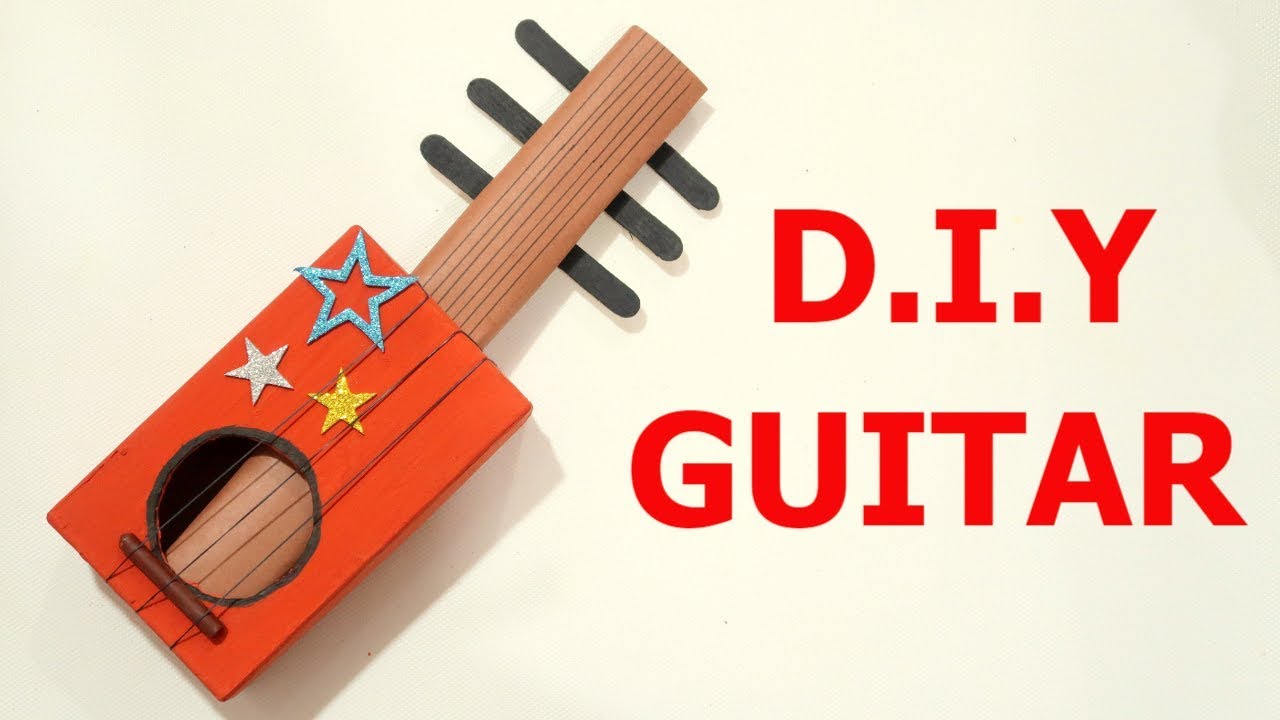
This guide is about those instruments. Easy DIY string instruments for kids are not complicated. You do not need special tools. You do not need expensive materials. You just need stuff you already have. And a little patience.
The Classic Rubber Band Guitar
This is the one everyone knows. It is simple. It is reliable. It is the best place to start.
Read Also: Ultimate Rig Rundown: Inside the Gear Behind the Sound
What you need:
-
A cardboard box. Shoeboxes work great. Cereal boxes work too. Even a tissue box will do.
-
Rubber bands. Different sizes and thicknesses are best.
-
A pencil or a wooden dowel. This will be your bridge.
-
Scissors. Adult supervision is needed for cutting.
How to build it: Cut a hole in the center of the box top. This is the sound hole. It helps the sound escape and makes it louder. Stretch the rubber bands around the box. They should go across the hole. Slide the pencil under the rubber bands near one end. This lifts them up and creates tension.
What happens next: Pluck a band. Listen to the sound. Move the pencil closer to the middle of the box. Pluck again. The pitch changes. Sliding the pencil changes the length of the string that vibrates. Shorter string = higher pitch. Longer string = lower pitch.
Why this works: The box amplifies the sound. The rubber bands are the strings. The pencil is the bridge. This is exactly how a real guitar works. Just smaller and cheaper.
Pros:
-
Takes five minutes to build
-
Uses materials you already have
-
Kids can decorate it
-
Teaches basic physics
Cons:
-
Rubber bands break
-
Sound quality is not great
-
Not very durable
Who is this for:
Kids aged 4 to 10. It is perfect for a rainy afternoon. It is also great for classrooms. I have used this in workshops with twenty kids at once. It works every time.
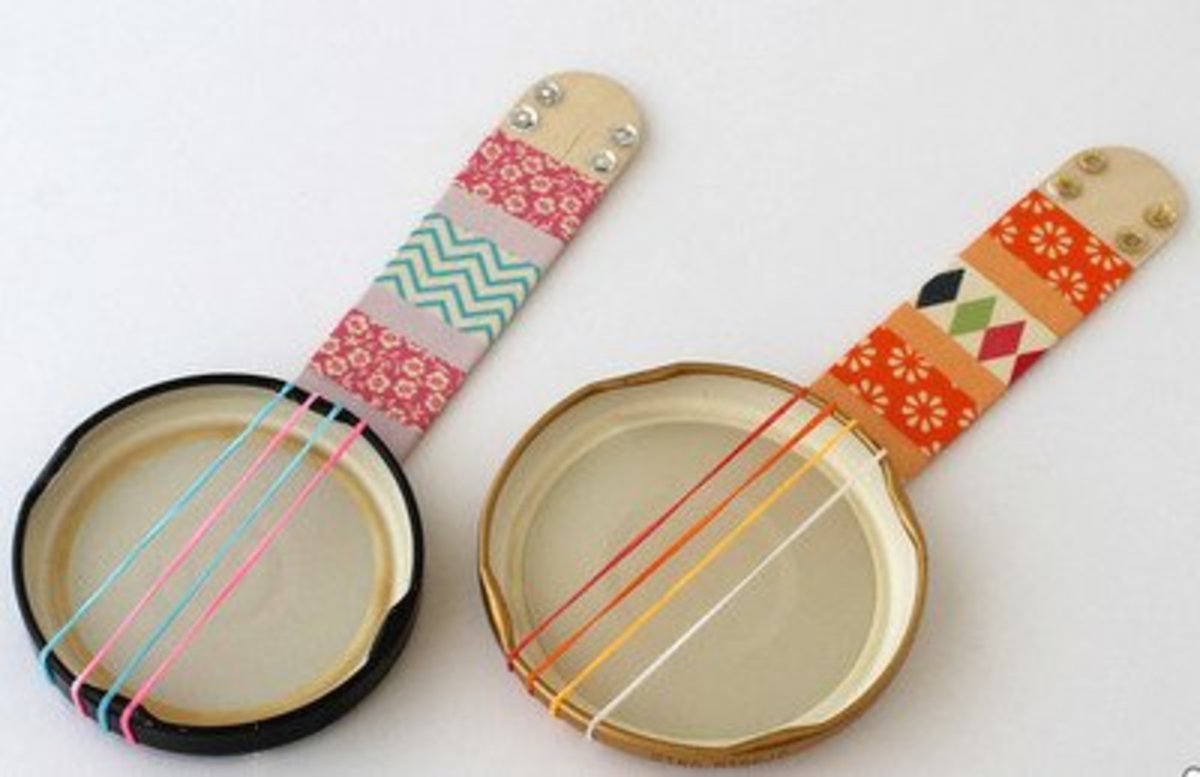
The Shoebox Ukulele
This is a step up from the basic guitar. It has more strings. It sounds a bit better. It looks cooler.
What you need:
-
A shoebox with a lid
-
Four rubber bands. Different thicknesses are ideal.
-
Two pencils or chopsticks
-
Tape
-
Scissors
How to build it: Cut a sound hole in the lid of the shoebox. Place the lid back on the box. Stretch four rubber bands lengthwise over the box. They should run from one short end to the other.
Place one pencil under the rubber bands near the top. Place the other pencil under the rubber bands near the bottom. This creates two bridges.
What happens next: Pluck each rubber band. They should sound different if they are different thicknesses. Thicker bands make lower sounds. Thinner bands make higher sounds.
This is because thickness changes the mass of the string. Heavier strings vibrate slower. Slower vibration = lower pitch.
Why this works: The two bridges create a defined vibrating area. The lid acts as a soundboard. It amplifies the vibrations. The result is a clearer, louder sound than the basic guitar.
Pros:
-
Sounds better than the basic guitar
-
More strings = more possibilities
-
Kids can paint it
-
Teaches about string thickness and pitch
Cons:
-
Takes longer to build
-
Rubber bands can slip
-
Bridges can move
Who is this for: Kids aged 7 to 12. It is also good for older kids who want to explore pitch and tuning. I have used this with middle schoolers. They liked experimenting with different rubber band combinations.
The Canjo – A Can Guitar
This is a strange one. I learned about it from a music teacher. She worked with special needs students. She needed instruments that were easy to hold and play. The canjo was her solution.
You Must Also Like: Top 5 Best Electric Guitars for Kids 2025
What you need:
-
A metal can. A large food can works best.
-
A wooden stick or dowel. About 18 inches long.
-
String or fishing line. Or thick rubber bands.
-
An eyelet screw
-
Tape
How to build it: Attach the wooden stick to the can using tape or glue. The can should be at the bottom. It acts as the resonator. Screw the eyelet into the top of the stick. This is your tuning peg. Tie the string to the eyelet. Stretch it down to the can. Tape it to the can.
What happens next: Pluck the string. Turn the eyelet screw to tighten or loosen the string. Tighter = higher pitch. Looser = lower pitch. You can also press the string against the stick to change the pitch.
Why this works: The can amplifies the sound. The stick is the neck. The eyelet acts as a crude tuning peg. It is not perfect. But it works. And it is loud. Louder than the shoebox guitar.
Pros:
-
Loud and clear sound
-
Unique design
-
Teaches about tension and pitch
-
Great for older kids and adults
Cons:
-
Requires more materials
-
Sharp edges on cans can be dangerous
-
Tuning is imprecise
Who is this for: Ages 8 and up. The canjo is a fantastic homemade musical instrument for adults who want to try something different. It is also great for schools and workshops. Just make sure to use a can opener that leaves no sharp edges.
The Straw Flute (With Strings)
This is not a string instrument. But I am including it because it is so easy. And kids love it. You can combine it with string instruments to create a band.
What you need:
-
Drinking straws. Different lengths.
-
Tape or glue
-
Scissors
How to build it: Cut the straws to different lengths. Arrange them from shortest to longest. Tape them together in a row. Blow across the top of each straw. Different lengths produce different pitches .
What happens next: Blow into the straws. Short straws make high sounds. Long straws make low sounds. This is because the length of the air column changes the pitch.
Why this works: When you blow across the straw, the air inside vibrates. A shorter air column vibrates faster. Faster = higher pitch. A longer column vibrates slower. Slower = lower pitch.
Pros:
-
Takes two minutes to build
-
No complex materials
-
Teaches about air and pitch
Cons:
-
Not very durable
-
Limited range of notes
-
Not a string instrument
Who is this for:
Kids aged 4 and up. It is a great addition to any instrument-making session.
The Box Xylophone
Again, not a string instrument. But it teaches the same principles. Pitch is about length, tension, and mass.
What you need:
-
Several glass bottles or jars
-
Water
-
A spoon or stick
How to build it: Fill the bottles with different amounts of water. Tap the bottles with a spoon. Different water levels produce different pitches.
What happens next: Tap each bottle. More water = lower pitch. Less water = higher pitch. This is because the water changes the mass of the vibrating object.
Pros:
-
Very easy to make
-
Sounds good
-
Teaches about mass and pitch
Cons:
-
Glass can break
-
Not portable
-
Not a string instrument
Who is this for:
Kids aged 6 and up. With adult supervision.
The Science of Sound
These instruments are fun. But they are also educational. Every time you build one, you are learning about sound.
Pitch depends on three things:
-
Length: Shorter strings make higher sounds. Longer strings make lower sounds .
-
Tension: Tighter strings make higher sounds. Looser strings make lower sounds .
-
Thickness: Thinner strings make higher sounds. Thicker strings make lower sounds .
You can test this yourself. Take a rubber band guitar. Move the pencil bridge. Pluck the string. Move it again. Pluck it again. You will hear the pitch change . This is not magic. It is physics.
The box amplifies the sound. A vibrating string is quiet. But when you attach it to a box, the box vibrates too. The box moves more air. More air movement = louder sound.
What to Avoid?
Not every instrument is a good idea. Some are dangerous. Some are frustrating. Here is what to avoid:
Glass containers: They break. They can cut you. Use plastic instead.
Sharp objects: Cans have sharp edges. Use a can opener that leaves a smooth edge. Supervise children with scissors.
Small parts: Rubber bands can snap. They can hit someone in the eye. Be careful.
Overly complex designs: Keep it simple. The best instruments are the easiest ones to make.
Practical Advice
These instruments are not built to last. They are built to be played with. Expect them to break. Expect the rubber bands to snap. That is fine. They are easy to replace.
Use different rubber bands: Thick, thin, long, short. Experiment. Each one will sound different. The more you experiment, the more you learn.
Add decorations: Let kids paint their instruments. Let them add stickers. This makes them personal. It also makes them more likely to be used.
Play together: Create a band. Use the guitar, the canjo, the straw flute, and the xylophone. Make noise. Have fun.
Final Thoughts
These easy DIY string instruments for kids are not about making perfect music. They are about exploring sound. They are about creativity. They are about making something with your hands.
I have built dozens of these instruments. I have built them with kids. I have built them with adults. Everyone enjoys it. It is a reminder that music is everywhere. You just need to find it.
The best part is the discovery. When a kid moves a pencil and hears the pitch change, that is real learning. They are not being told. They are finding out for themselves.
So find a shoebox. Find some rubber bands. Find a pencil. Start building. The process is the point. The music is just a bonus.